Saturation Diving Best Gear Loadout
What to buy first, when to upgrade, and the endgame trio every build pivots around.
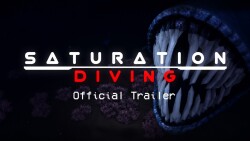
This guide walks through the best gear progression in Saturation Diving, from a fresh save on Twilight Reef to a maxed Black Mound build. The goal is the cheapest path to an A-tier trio — Cryo Helix Tank + Hydraulic Core-Bit + Triton Mark VII — without spending credits on dead-end upgrades that get replaced two patches later. Pair this list with the tier list for tier rationale and the upgrade guide for credit math.
First Thousand Credits (Twilight Reef, Levels 1-10)
Your first credits should go to a Twin Reserve tank, a Reefwalker IV suit, and a Hydraulic Core-Bit drill. Skip the Photon Flood Array for now — a Salvaged Glowstick covers lighting on Twilight Reef and saves 800 credits. Skip perks: every starter perk re-rolls once you hit level 15, so spending credits early just throws them away. The only exception is Pressure Stability, because the early skill ranks are cheap and the late ranks get gated by zone access.
- Twin Reserve tank — 12 minutes baseline air, enough to clear a full Twilight Reef pipeline run with margin. Replaces the 6-minute Salvaged Tank drop.
- Reefwalker IV suit — unlocks 2.8 atm diving, opens Mid Ridge once the tutorial is done. Best credits-per-pressure-cap ratio in the early game.
- Hydraulic Core-Bit drill — the strongest starter drill by a wide margin. The Cordless Hammer-Drill is faster in some narrow pipes but lacks the ore-per-second baseline.
First Five Thousand Credits (Mid Ridge, Levels 10-25)
Your next credits should buy a Photon Flood Array for lighting, a Pulse Array Mk III sonar for spotting ore, and an Abyssal Plate suit if you plan to push into Black Mound before level 30. Skip the Mk II sonar — the price difference is small and the Mk III adds a third-wall reveal that pays for itself in two runs.
- Photon Flood Array — first lighting upgrade that does not force you to babysit the recharge meter. The Captain build wants this; the Salvager can wait.
- Pulse Array Mk III sonar — ore reveal through three walls plus the longest entity ping radius. Pays for itself in two runs.
- Abyssal Plate suit — bridge between Reefwalker IV and Triton Mark VII for divers who want Black Mound access before level 30. Slightly worse air efficiency than Reefwalker IV.
Endgame Trio (Black Mound + Abyssal Hollow, Levels 25+)
Once you can reliably farm Mid Ridge, the next credits should converge on the endgame trio: Cryo Helix Tank + Hydraulic Core-Bit drill + Triton Mark VII suit. The Cryo Helix doubles effective oxygen time and is the single largest individual upgrade any Captain build can buy. The Triton Mark VII is the only suit with a built-in 4.2 atm pressure cap, which gates Black Mound. Together they unlock the deepest hadal content.
- Cryo Helix Tank — top of the tier list oxygen tanks. Doubles effective air time; required for solo Salvager deep runs.
- Hydraulic Core-Bit drill — highest ore-per-second baseline. Hidden pressure bonus on Black Mound pipes.
- Triton Mark VII suit — only suit with built-in 4.2 atm pressure cap. Mandatory for Black Mound; mandatory for any Abyssal Hollow route.
Perks To Pick First
Three perk lines are universally worth picking first: Pressure Stability, Drill Efficiency, and Detection Radius. Pressure Stability reduces incoming pressure damage by up to 40% at max rank; Drill Efficiency adds 25% ore-per-second and pays for itself in three runs; Detection Radius expands the sonar cone by 35% which makes Captain coordination dramatically easier. Skip Crank Bonus (removed in the July 2026 rework) and Quick-Swap unless you are a Speedrun Salvager.
Captain Best-In-Slot
The Captain build runs Cryo Helix Tank + Photon Flood Array + Pulse Array Mk III with the Pressure Stability skill tree. The Captain is the squad anchor: they pilot the submarine, call sonar pings, and coordinate the surface window. The Cryo Helix gives the Captain enough air margin to stay submerged while the squad salvages, and the Photon Flood Array lights the wide corridors where Captains typically operate. The Pressure Stability skill tree keeps the Captain alive when a hadal zone mob aggros unexpectedly.
Engineer Best-In-Slot
The Engineer build runs Hydraulic Core-Bit + Reefwalker IV + Dual Beam Helmet with the Drill Efficiency skill tree. The Engineer is the ore engine: they mine pipes, repair breaches, and feed the squad’s credit pipeline. The Hydraulic Core-Bit has the highest ore-per-second baseline; the Reefwalker IV gives the Engineer enough pressure margin to stay in Mid Ridge without burning the squad’s Cryo Helix tank. The Drill Efficiency perk line multiplies the Engineer’s contribution by 25%.
Spotter Best-In-Slot
The Spotter build runs Dual Beam Helmet + Pulse Array Mk III + Echo Tracker (unlocked at level 30) with the Detection Radius skill tree. The Spotter is the squad’s eyes: they ping ore, watch for entities, and call surface timing. The Dual Beam Helmet has the narrowest cone but the longest throw distance, which makes it perfect for Spotter sniping from the back of a swarm. The Echo Tracker becomes available at level 30 and adds the best detection cone in the game, though it loses ore reveal — pair it with a Captain carrying the Mk III for full coverage.
Salvager Best-In-Slot
The Salvager build runs Triton Mark VII + Twin Reserve + Salvaged Glowstick with Pressure Resistance and Salvage Multiplier perk lines. The Salvager is the loot collector: they crack rare containers, mine rare ore veins, and bank the squad’s bonus rewards. The Triton Mark VII is mandatory for Black Mound access; the Twin Reserve tank gives the Salvager air margin for solo deep runs without burning the squad’s Cryo Helix supply. The Pressure Resistance + Salvage Multiplier combo is the entire reason to play Salvager over Engineer.
When To Switch Roles
Most players specialize in one role for the first twenty levels, then unlock a second role once they understand the squad meta. The recommended second role for Captain mains is Spotter (coordination overlap); for Engineer mains is Salvager (loot overlap); for Spotter mains is Captain (timing overlap); for Salvager mains is Engineer (ore overlap). Divers who try to play all four roles equally tend to underperform in every squad slot — the perk tree investment is too deep to spread across four builds.
How To Read Patch Impact
Every patch reshuffles this list slightly. The wiki tries to flag every rebalance on the updates tracker within an hour, so check the updates page before any major credit dump. The two patterns to watch are: (1) a drill gets nerfed and the next-best option becomes the new meta — usually a mid-tier drill jumps one tier; (2) a tank gets buffed and the upgrade priority shifts — usually a B-tier tank jumps into A-tier for a single patch. Both patterns are temporary: the meta settles within a week and the credit math returns to the trio above.
Common Mistakes
The most common mistake is buying the Cryo Helix Tank before you have the Pressure Stability perks to back it up. The Cryo Helix extends your air time, but if you are taking pressure damage in hadal zones, you will still black out — just with more margin before you run out of oxygen. The second most common mistake is skipping the Photon Flood Array as a Captain because the Salvaged Glowstick feels good enough; in Black Mound the Glowstick’s narrow cone gets you cornered by entities. The third is spending credits on perk rerolls in the first ten levels — every perk reroll is wasted credits because the perk tree resets at level 15.
What Comes After The Trio
Once you have the endgame trio, the wiki recommends farming the tier list S-tier perks to max rank and then pivoting to either a Speedrun Salvager build (for Black Mound speedrun routes) or a Support Captain build (for public-lobby coordination). Most players stop at the trio because the perk investment beyond S-tier has diminishing returns. The wiki marks this in the tier list with a footnote so you can see at a glance where the credit-per-impact ratio drops.
Frequently Asked Questions
Quick answers to the most common questions.
What is the single best early upgrade?
Twin Reserve tank. It replaces the 6-minute Salvaged Tank drop with a 12-minute tank that carries you through Twilight Reef with margin, and you can buy it for under 800 credits at the cargo bay.
Should I save credits for the Cryo Helix Tank or buy smaller upgrades first?
Buy smaller upgrades first. The Cryo Helix is the largest single upgrade but it requires you to have the Pressure Stability perks to back it up — without those, you black out with more oxygen to spare, which is the worst kind of death.
Is the Photon Flood Array worth it on a Salvager?
Not in the early game. Salvagers can run Salvaged Glowstick until they hit Black Mound; the Glowstick's narrow cone is fine for solo play, and the 800-credit savings fund the next perk rank.
How do I know when to switch roles?
After level 20 in your main role, unlock a second role that shares an overlap — Captain mains pick Spotter, Engineer mains pick Salvager, and so on. Trying to play all four equally underperforms because the perk investment is too deep.
Do perks reset when a new patch ships?
No, perks persist across patches. The perk tree was reworked in July 2026, but the wiki tracks every rebalance on the updates tracker so you can adjust your build before the next patch drops.