Saturation Diving Dive Zones Walkthrough
Seven confirmed zones from the shallow reef to the deepest hadal trench — with the squad comp and loadout each one expects.
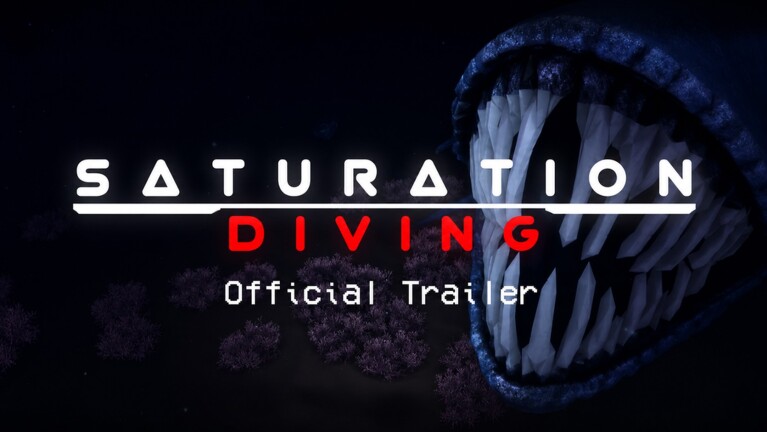
This page is the complete zone guide for Saturation Diving. Every dive zone is documented here with the unlock requirement, the pressure cap, the entity roster, the credit-per-run math, and the squad comp that the wiki team recommends. Pair this guide with the entity catalogue for the monster patterns in each zone, and with the walkthrough for the full run order the developer intends you to experience the game.
How Zones Scale
Seven zones are confirmed as of September 2026. The developer has flagged two more (Hadal Trench and Bioluminescent Caves) on the Trello roadmap for late-2026 release. The seven live zones span the full depth range from shallow reef to the deepest confirmed hadal environment:
| Zone | Pressure | Level | Credit-per-run | Unlock |
|---|---|---|---|---|
| Twilight Reef | 0.5 atm | 1–10 | 1,200 | Starter |
| Mid Ridge | 2.8 atm | 10–25 | 3,800 | Reefwalker IV suit |
| Blue Hole | ~3.0 atm | 15–30 | ~4,200 | Life Line / Mothray Eel light protocol |
| Black Mound | 4.2 atm | 25–40 | 8,500 | Triton Mark VII suit + Pressure Stability perk maxed |
| Cragmire | Unknown atm | Unknown | Unverified | Full four-role squad; magma + pressure combined |
| Abyssal Hollow | 5.0 atm | 40+ | 14,000 | Full four-role squad, all perks maxed |
| Glacier Scar | ~5.5 atm | 45+ | ~16,000 | Full four-role squad, Brineglass navigation mandatory |
| Crash Plateau | crash-site | badge-gated | lore / Mysterious Log | Collect and play the log |
Crash Plateau is the wreck zone named on a live Roblox badge. Read crash sites before you skip a first-hour reef to hunt a hero log.
Pressure cap is the gate that locks you out of each zone. The Reefwalker IV suit unlocks 2.8 atm, the Triton Mark VII suit unlocks 4.2 atm, and only the Pressure Stability perk maxed at level 11 lets you survive the Abyssal Hollow’s 5.0 atm. Glacier Scar’s estimated ~5.5 atm exceeds Abyssal Hollow and requires the same maxed Pressure Stability plus strict terrain management. The wiki tracks every perk and suit that gates a zone on the tier list.
Twilight Reef (Levels 1–10, 0.5 atm)
Twilight Reef is the starter zone and the safest place to learn the dive loop. Three pipe clusters, two coral reefs, and one kelp forest make up the dive site. Pressure is shallow enough that any starting suit works, and the entity roster is limited to passive ambient creatures.
What You Do Here
Mine the three pipe clusters for common ore, salvage the coral reefs for Reefwalker IV fragments, and bank credits at the cargo bay. The Twilight Reef starter set (Reefwalker IV + Salvaged Glowstick + Twin Reserve tank) pays for itself in roughly 8 loops, after which you can afford your first mid-tier upgrades.
Best Squad Comp
Solo Captain is fine. The zone is shallow enough that the lack of sonar coverage does not matter, and the entity roster is passive. The wiki recommends solo Captain for the first 5 levels, then Captain + Engineer duo from level 5 onward.
Common Mistakes
- Sprinting in Twilight Reef wastes oxygen — you have nothing to chase.
- Mining the same pipe cluster twice — the cluster respawns on a 4-minute timer, not instant.
- Ignoring the coral reefs — the Reefwalker IV fragment is the single biggest credit win in the early game.
Mid Ridge (Levels 10–25, 2.8 atm)
Mid Ridge is the mid-game zone where most divers spend their first 20 hours. The zone is a long ridge with two pipe clusters, two salvage wrecks, and three entity spawns (Pressure Wraith, Maw Crawler, Lure Eel). Pressure is moderate enough that any mid-tier suit works.
What You Do Here
Mine the upper pipe cluster, then the lower pipe cluster, surface, repeat. Credit yield is roughly 3,800 credits per cycle with mid-tier gear (Cryo Helix Tank + Hydraulic Core-Bit + Reefwalker IV). The Pressure Wraith encounter gates Black Mound access — first kill per session drops the Black Mound access ticket.
Best Squad Comp
Captain + Engineer + Spotter trio is the meta. The trio covers sonar (Spotter), lighting (Captain), and ore (Engineer) with no redundancy. The Salvager joins for loot runs but is skippable for credit grinding.
Common Mistakes
- Pinging the Pressure Wraith repeatedly — it chains aggro.
- Skipping the Pulse Array Mk III sonar — the Mk II is too short-ranged for the Pressure Wraith’s 50m aggro.
- Under-geared Salvagers — the Salvage Multiplier perk is mandatory for Mid Ridge credit grinding.
Blue Hole (~3.0 atm, Levels 15–30)
Blue Hole is the light-critical zone where your flashlight decision determines survival. Named for the blue-tinted sand that gives the zone its visual identity, Blue Hole hosts two creatures that punish opposite light conditions — making it the most decision-dense zone per minute of dive time. See the Blue Hole guide for the full light protocol and creature breakdown.
What Makes Blue Hole Unique
Every other zone rewards a consistent light strategy. Blue Hole breaks this pattern: the Life Line (a diver mimic) does not attack when a medium-intensity light is pointed at it, but attacks in dim light. The Mothray Eel is attracted to bright lights and pursues players running Photon Flood Array or Dual Beam Helmet at increased speed. The squad must run Salvaged Glowstick (dim light) on most divers while the Spotter uses Dual Beam Helmet angled forward toward pipe clusters only.
Best Squad Comp
Captain + Engineer + Spotter + Salvager, with Salvaged Glowstick on Captain, Engineer, and Salvager. Spotter runs Dual Beam Helmet angled toward ore targets, never sweeping the floor directly.
Common Mistakes
- Running Photon Flood Array — the Mothray Eel aggros from across the zone.
- Zero light — the Life Line reads no-light players as prey.
- Stopping in open sand — both creatures are most dangerous when the player is stationary.
Black Mound (Levels 25–40, 4.2 atm)
Black Mound is the hadal-tier zone where the meta crystallizes. The zone is a deep mound with four pipe clusters, three salvage wrecks, and three entity spawns (Hadal Pull boss, Abyssal Stalker, Void Siren). Pressure is heavy enough that only the Triton Mark VII suit survives.
What You Do Here
Run pipe clusters in 90-second windows, surface between windows, repeat. The Captain parks the submarine on the trench rim, the Engineer drops repair charges on the rim to counter the Hadal Pull’s pull force, and the squad runs pipe clusters within the 90-second window. Credit yield is roughly 8,500 credits per run with the Triton Mark VII + Salvage Multiplier build.
Best Squad Comp
Full four-role squad is mandatory. The Hadal Pull pulls solo divers into the trench in under 30 seconds, and the Void Siren aggros on squad sizes above four — so the optimal squad size is exactly four. Captain + Engineer + Spotter + Salvager.
Common Mistakes
- Crossing 4.2 atm without the Triton Mark VII — you black out in 8 seconds.
- Five divers — the Void Siren aggros on squad sizes above four.
- Ignoring the Hadal Pull’s pull force — the repair charges on the trench rim are mandatory.
Cragmire (Unverified Pressure, Unknown Levels)
Cragmire is the fifth dive site, confirmed by community wikis within hours of the 28 August 2026 Roblox place update. It features red-water visual atmosphere, magma hazards (thermal vents and static magma pockets), and the highest Sanguinite density of any zone. See the Cragmire guide for full details.
What Is Known
Three characteristics confirmed by the community: a red-water visual atmosphere, magma hazards on a timed pulse cycle plus static magma pockets, and the highest Sanguinite density in the game — making Cragmire the fastest route to the Dig dig dig to the center of the earth! badge.
What Is Still Being Verified
Pressure cap, level range, entity roster, and magma pulse timing are community-reported and not yet confirmed by the developer.
Best Squad Comp
Full four-role squad. Spotter’s sonar is critical for routing around magma pockets, which are invisible through the red water until you are inside them. Engineer carries additional repair charges for heat damage.
Abyssal Hollow (Levels 40+, 5.0 atm)
Abyssal Hollow is the endgame zone where the wiki currently logs roughly 5% of all divers. The zone is a deep hollow with the Maw Lord boss, two Hollow Wraith patrols, and one salvage vault. Pressure is the second-highest in the game.
What You Do Here
Clear the Maw Lord encounter for the Triton Mark VII upgrade token, then run the salvage vault for rare ore. The Maw Lord is a three-phase encounter that requires a full four-role squad with all perks maxed and a coordinated Panic Checklist run. Credit yield is roughly 14,000 credits per clear, plus the upgrade token on first kill.
Best Squad Comp
Full four-role squad, all perks maxed. Captain holds the Panic Checklist ready, Engineer carries repair charges, Spotter marks the Maw Lord’s patrol path with the Echo Tracker, and Salvager banks the upgrade token. Any mistake in phase two chains into an enrage in phase three, so the wiki recommends running the encounter in voice comms.
Common Mistakes
- Under-perked Captain — the Panic Checklist requires Pressure Stability maxed.
- Solo divers — the Maw Lord is impossible solo.
- Skipping the salvage vault — the rare ore inside is worth more than the upgrade token.
Glacier Scar (Levels 45+, ~5.5 atm)
Glacier Scar is the deepest and most dangerous confirmed zone in Saturation Diving, matching the official description’s “frigid dead environments” precisely. White sand stretches barren across the zone, a giant ravine runs beside the diving bell creating an isolated spawn island, and Brineglass colonies coat the ground with near-zero friction. See the Glacier Scar guide for the full terrain survival guide.
What Makes Glacier Scar the Hardest Zone
Glacier Scar compounds difficulty in three ways: zero-traction terrain (Brineglass colonies make running impossible — you slide toward the nearest edge), more fall points than any other zone due to the giant ravine, and Crownspine — a ranged ambush predator not found in any other zone that fires spike volleys at players 30–40 metres away.
Best Squad Comp
Full four-role squad with strict terrain discipline. Captain parks at the diving bell and coordinates. Engineer mines nearest clusters only. Spotter runs Dual Beam Helmet for Crownspine detection and pings ravine edges and Brineglass boundaries. Salvager stays closest to the bell and banks frequently. No solo retrievals across Brineglass.
Navigation Rules
- Never run in Glacier Scar — walking is the only safe speed.
- Cross bridges continuously without stopping — Crownspine can hit a stationary target.
- Keep all squad members within visual range of the diving bell.
How Zones Change Per Patch
Every patch reshuffles the credit-per-run numbers and sometimes the entity roster. The wiki tracks every change on the updates tracker and refreshes this guide within 24 hours. Two patterns to watch:
- A hadal entity gets buffed and the zone becomes harder — usually a zone jumps from B-tier to A-tier difficulty, and the wiki flags it on the tier list with a footnote.
- A new pipe cluster spawns in a shallow zone — usually the developer adds it as an event encounter and the wiki flags it on the updates tracker within an hour.
How To Read The Wiki Recommendations
Every wiki recommendation comes with a patch tag. If the wiki says “Captain + Engineer + Spotter is the Mid Ridge meta” and the patch tag is older than 30 days, check the updates tracker for a more recent recommendation. The meta is volatile in the first week after a patch and stable for the next 6–8 weeks. Divers who follow the wiki recommendations during the volatile week tend to over-index on whatever the most recent buff was; waiting for the meta to settle usually saves credits.
Frequently Asked Questions
Quick answers to the most common questions.
Which zone is best for farming credits?
Black Mound at roughly 8,500 credits per run, but only with a full four-role squad and the Triton Mark VII. Abyssal Hollow pays more per run but the Maw Lord encounter takes 5 minutes, so the per-hour yield is actually similar. Glacier Scar estimates ~16,000 credits per clear but requires the highest skill floor of any zone.
What gear do I need for Abyssal Hollow?
Full S-tier loadout: Cryo Helix Tank + Triton Mark VII + Hydraulic Core-Bit + Pressure Stability perk maxed. Plus the Pressure Resistance perk if you are playing Salvager. Without all four, the 5.0 atm pressure will black you out in under 10 seconds.
Are private server zones harder or easier?
Easier. Private servers spawn roughly 60% of the public-server entity count and roughly 70% of the credit yield. The wiki tests new patterns in private servers before publishing them, but the credit math in this guide is based on public-server data so your private-server yield will be lower.
How long does it take to fully clear all zones?
Roughly 80–120 hours for a new diver, depending on squad consistency and perk priority. The wiki tracks a per-zone time estimate on the updates tracker so you can pace your grind against the average divers on the Discord.
Will new zones be added?
Yes. The developer has flagged Hadal Trench and Bioluminescent Caves on the Trello roadmap for late-2026 release. The wiki will publish zone guides for both within 24 hours of each patch. Subscribe to the wiki Discord #content channel for the early heads-up.
What is the hardest zone in Saturation Diving?
Glacier Scar is the most dangerous zone per square metre due to zero-traction Brineglass terrain, more fall points than any other zone, and Crownspine ranged ambush predators. Abyssal Hollow has the hardest boss encounter. Cragmire has the highest combined mechanical complexity with magma plus pressure hazards.
What is Blue Hole and why is it different?
Blue Hole is a light-critical zone where the Life Line (attacks in dim light) and the Mothray Eel (attacks in bright light) demand opposite strategies from the squad. The Spotter runs Dual Beam Helmet angled forward; everyone else runs Salvaged Glowstick. See the [Blue Hole guide](/guides/blue-hole/) for the full protocol.