Saturation Diving Deep-Sea Entities Guide
Every monster in every zone, with the safe pattern each one expects.
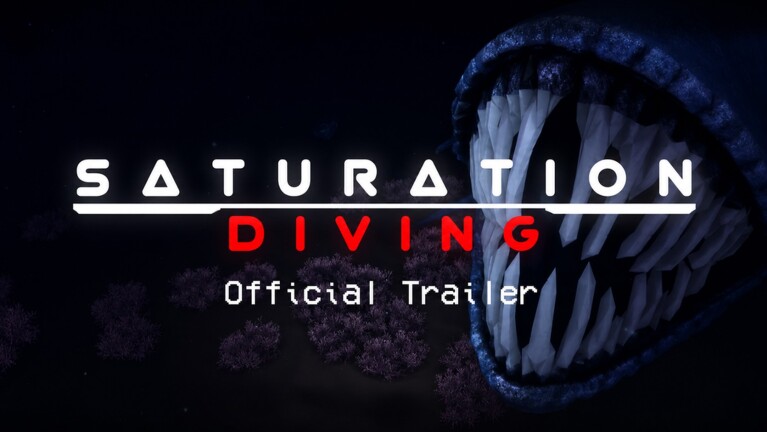
This page is the complete entity catalogue for Saturation Diving. Every monster that aggros on sight, sound, sonar ping, or pressure threshold is documented here with the zone it spawns in, the trigger that pulls it, and the safe pattern divers use to either avoid it or take it down. Pair this guide with the zone guide to know which entities spawn where, and with the how to survive page for the panic-rule checklist that handles surprise aggro.
How The Entity System Works
Three triggers can pull an entity:
- Sight — line-of-sight aggro within 60m. Most Twilight Reef entities are sight-triggered.
- Sound — sprinting, drilling, and surface bubbles pull sound aggro up to 120m.
- Sonar — firing the Spotter’s Pulse Array Mk III or Echo Tracker reveals entity shadows within 50m and can chain aggro if the entity is already alerted.
Pressure also plays a role: hadal-zone entities are passive in shallow water and aggressive in deep water, so crossing the 3.5 atm threshold while sprinting is the most common cause of wipes. The wiki tracks every aggro trigger per entity below.
Grimreefs (Live Named Entity)
Grimreefs are confirmed by Roblox badge text, not by a fan bestiary. Badge Simply Better: Kill two grimreefs in one level. That is a tighter window than Hunter (any monster) or Hunter Killer (ten in one run).
- You need two kills inside the same level, not across a whole dive.
- They are hostile enough to be worth a named award. Do not treat them as ambient fish.
- Pair the hunt with monster logs only if your tank can spare the detour. Simply Better is a combat badge; logs are collectibles.
- Public 50-player rooms will steal kills. Hop or blob with friends (co-op).
If a patch renames grimreefs, the badge string is still the source of truth until The_BucketHead changes it.
Twilight Reef Entities (Levels 1–10)
Glow Squid
A passive ambient creature that floats through Twilight Reef’s kelp and casts cyan light around the diver. Pulls aggro only if hit. The wiki lists it as friendly — do not waste the Salvaged Glowstick’s battery on it. Drops nothing.
Brine Jelly
A semi-aggressive jellyfish that drifts at depth. Touching it deals 5 hull damage per second. Pulls aggro on sight within 15m. The safe pattern: swim around the jellyfish’s outline, never through the bioluminescent core. Drops common ore fragments (worth 8 credits each).
Coral Lurker
A camouflaged bottom-dweller that hides inside Twilight Reef’s coral clusters. Sight-triggered within 8m. The safe pattern: hold the Salvaged Glowstick in front of the diver and watch for the silhouette to detach from the background. Drops a Reefwalker IV fragment (worth 50 credits) the first time you kill one per session.
Mid Ridge Entities (Levels 10–25)
Pressure Wraith
The headline Mid Ridge encounter. The Pressure Wraith is invisible until it aggros, then it phases through walls and pulls divers toward itself. Aggro trigger: sonar ping within 50m. The safe pattern: the Spotter pings the Wraith once to mark it, the squad stays outside the 25m circle, and the Captain calls surface within 60 seconds of the first ping. The Wraith despawns when the squad surfaces. Drops Black Mound access tickets (worth 200 credits each) on first kill per session.
Maw Crawler
An aggressive multi-legged creature that patrols Mid Ridge’s pipe clusters. Sight-triggered within 30m. The safe pattern: the Engineer holds the Hydraulic Core-Bit ready and the Spotter marks the Maw Crawler’s patrol path with beacons. The squad surfaces when the Maw Crawler’s patrol crosses their node. Drops mid-tier ore (worth 30 credits per cluster).
Lure Eel
A passive fish that emits a bioluminescent glow to attract divers, then attacks when they touch the glow. Aggro trigger: proximity to the glow within 4m. The safe pattern: do not chase the glow; instead, the Salvager flanks the glow from behind using the Twin Reserve tank’s extended air margin. Drops rare ore (worth 75 credits each).
Black Mound Entities (Levels 25+)
Hadal Pull
The boss of Black Mound. The Hadal Pull is a stationary entity at the bottom of the hadal trench that pulls every diver toward itself with increasing force. Aggro trigger: any diver crosses 4.2 atm (the Triton Mark VII’s pressure cap). The safe pattern: the Captain parks the submarine on the trench rim, the Engineer drops repair charges on the rim to counter the pull, and the squad runs pipe clusters in 90-second windows before resurfacing. Drops the Triton Mark VII blueprint (worth 1,500 credits) on first kill per session.
Abyssal Stalker
A predator that patrols Black Mound’s outer ring. Aggro trigger: sight within 40m or sound within 80m. The safe pattern: the Salvager carries the Triton Mark VII and uses Pressure Resistance perks to survive a single aggro, the Spotter marks the patrol path with beacons, and the squad surfaces when the Stalker’s patrol crosses their pipe. Drops rare ore (worth 100 credits per cluster).
Void Siren
A siren that emerges from Black Mound’s hadal trench when more than four divers are submerged at the same time. Aggro trigger: squad size above four. The safe pattern: split into two squads of three, each with their own submarine. Drops the rare salvage container key (worth 500 credits) on first kill per session.
Abyssal Hollow Entities (Levels 40+, Endgame)
Maw Lord
The Abyssal Hollow boss. The Maw Lord is a multi-phase encounter with three stages: passive patrol, aggro at sight, and enrage at 25% hull. Aggro trigger: any diver crosses 5.0 atm. The safe pattern: full four-role squad with all perks maxed, the Captain holds the Panic Checklist ready, and the squad commits to the full 5-minute encounter. Drops the Triton Mark VII upgrade token (worth 2,500 credits) on first kill per session.
Hollow Wraith
A faster, harder version of the Pressure Wraith that patrols the Hollow’s corridors. Aggro trigger: sonar ping within 70m. The safe pattern: the Spotter uses the Echo Tracker at maximum range, marks the Wraith without alerting it, and the squad avoids the marked corridor for the rest of the run. Drops nothing — Hollow Wraiths are pure environmental hazard.
How To Read Entity Patterns
Every entity pattern follows the same template: trigger (what pulls aggro), safe pattern (how to avoid or kill), drops (what you get for killing it). The wiki tracks all three columns and refreshes them within 24 hours of every patch. Two patterns to watch:
- A hadal entity gets buffed and the safe pattern breaks — usually a B-tier encounter jumps to A-tier difficulty and the squad needs a full perk reset to clear it.
- A new entity spawns in a shallow zone — usually the developer adds it as an event encounter and the wiki flags it on the updates tracker within an hour.
Common Mistakes
- Sprinting in hadal zones — the most common cause of wipes. The Hadal Pull aggros on any sprint within 4.2 atm. Walk, do not sprint.
- Pinging the Wraith repeatedly twice — the Pressure Wraith chains aggro on repeat pings. Ping once, then surface.
- Chasing Lure Eels — the Lure Eel’s glow is a trap. Mine the cluster next to it, not the glow itself.
How To Report A New Entity
If you encounter an entity that is not documented here, open a thread on the wiki Discord #content channel with the entity name, the zone, the aggro trigger, and a screenshot if possible. The wiki maintains a public Trello board where new entities are voted on before being added to this catalogue. Reports without screenshots are usually not actionable, so include a screenshot whenever you can.
Why The Wiki Catalog Exists
Most divers learn entity patterns the hard way: by dying. This catalogue is the wiki’s attempt to flatten that learning curve so you can plan your squad composition, perk loadout, and surface timing before the first wipe. The wiki team maintains this page alongside the zone guide and the how to survive checklist so you can cross-reference any entity against the zone it spawns in and the survival tactics that apply.
Frequently Asked Questions
Quick answers to the most common questions.
What is the most dangerous entity in Saturation Diving?
The Maw Lord in Abyssal Hollow. It is a three-phase encounter that requires a full four-role squad with all perks maxed, and any mistake in phase two chains into an enrage in phase three. Most wipes happen in the first 60 seconds of the enrage phase.
Can solo divers clear hadal zones?
Technically yes, but the Hadal Pull's aggro pulls solo divers into the trench in under 30 seconds. Solo play in hadal zones is reserved for grinding credits on shallow Twilight Reef. Bring a full squad for any Black Mound or Abyssal Hollow run.
How do I detect an invisible entity like the Pressure Wraith?
Use the Spotter's Echo Tracker at level 30 or above. The Echo Tracker reveals entity shadows within 70m, which is enough warning to surface before the Wraith aggros. Mark the Wraith without pinging it — pings chain aggro.
Do entities respawn during a run?
Yes, but on a long cooldown. The Pressure Wraith respawns every 4 minutes, the Maw Crawler every 6 minutes, and the Hadal Pull every 8 minutes. The wiki tracks the respawn timer per entity on the updates tracker so you can plan your surface timing around it.
Can I practice entities in a VIP server?
Official VIP / private servers are disabled on this universe. Learn patterns in quieter public rooms by hopping, or dive with a coordinated squad — see the co-op guide.